Can you Sublimate Over Sublimation?
Do you want to know if can you sublimate over sublimation? All of the information you require is provided. Read on.
You might wonder, “Can you sublimate over sublimation?” The answer is yes, you can! But it’s important to do it the right way. Before you start, make sure you understand the process.
This guide will show you how to layer sublimation prints correctly and avoid common mistakes. Follow our tips to confidently begin your sublimation-over-sublimation project and achieve great results.
Key Takeaways:
- You can sublimate over an existing sublimation layer, but proper technique is crucial.
- Sublimation requires heat and pressure to turn solid ink into gas, bonding it with the material.
- Start with a single-color background to avoid color mixing issues and achieve clear results.
- Use a heat press, sublimation paper, and heat-resistant tape, ensuring precise alignment for best results.
- Be aware of potential issues like ghosting and color distortion; careful handling can help avoid these problems.
Related Post: Can you Sublimate on Bamboo Fabric
Understanding How Sublimation Works:
There is some magic in the sublimation process. Change is what sublimation is all about at its core. When heated and under pressure, solid sublimation ink changes into a gas without a liquid phase. This forms an unbreakable link with the molecules of the substrate.
It’s beautiful, colorful, and lasts forever, like a butterfly coming out of its cocoon. A sublimation layer could even be seen as a way to sublimate on top of sublimation, which would be a whole new level of sublimation.
It is very interesting to see how a sublimated design gets from your computer screen to the finished result. These are the steps you need to take:
Use special software to make your idea come to life.
Use dye-based sublimation ink to print it on sublimation paper. When heated and pressed, it will turn into a gas.
Heat the fabric and put the transfer paper on top of it. This will make the colors evaporate and soak into the fabric.
This makes a bright picture that is part of the fabric and not just on it.
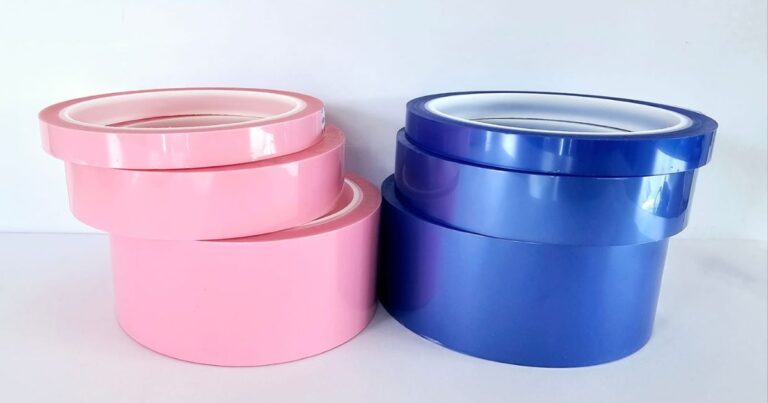
Heat and pressure are very important to this process. They turn solid inks into a gas that mixes with the material. This makes a picture that won’t fade even after being washed and worn. Heat-resistant tape is used to stick the sublimation paper to the fabric during the process to make sure the image is exact.
Can you Sublimate On Sublimation?
The correct answer is that yes you can sublimate on top of sublimation. Can you sublimate on top of sublimation? Anything that has been exposed to sublimation paint before can be exposed to it again.
The question isn’t whether you can sublimate on top of an existing sublimation but whether it will look the way you want it to.
To get this to work right, you should sublimate over a one-color pattern that was already printed on the material, and you should make sure you have the best sublimation printer possible.
If you sublimate over a drawing that was sublimated in more than one color, the result might not look good because of things like
When fired up again, the old and new colors mix in a way that doesn’t look good.
The color(s) that got mixed up between the old and new designs.
When you heat the new layer for sublimation, it takes on some of the colors from the old image.
Related Post: Can You Sublimate On Acrylic
How To Sublimate in Layers:
If you want to sublimate something, like a mug, t-shirt, frame, or anything else, you might want to put more than one image on it. A name, a picture, or two styles that look good together could be on a fun background.
The steps below will show you how to quickly sublimate more than one layer of heat transfer or sublimation paper onto an item with as little mess as possible:
Step 1) Collect your Tools and Supplies:
For this project, you will need a heat press, heat transfer paper with designs on it, scissors, standard duct tape, and good double-sided duct tape.
Step 2) Decide where the Layers will go:
Get your sublimation paper out and make a plan for where each layer will go. See where the design fits about the item you’re sublimating and where it fits with each other.
Take the case of sublimating a t-shirt that has a “Happy Holidays” design and a design of snow falling in the background. Let’s say that the finished design is supposed to have “Happy Holidays” on top of the snowy background.
Putting the “Happy Holidays” sublimation paper on top of the snow-patterned paper will help you do this. You need to be very careful about where you put “Happy Holidays” in the background.
Tip: At this point, you should also trim the edges of the colored paper on top.
As close as possible to the phrase if you want a high amount of blending. More space around the word will make it stand out from the background.
Leave about a quarter of an inch of paper around it.
Step 3) Tape the Top Layer to the Bottom Layer:
Once you’re sure where the phrase paper should go over the background and the item, measure where the top paper should be with the background paper.
Next, take off the heat transfer papers and get the duct tape with two sides. Put one or two strips of tape on the back of the top sublimation paper after cutting them.
Then, take the top sublimation paper and stick it on the background sublimation paper where you thought it should go.
Tip: Before you glue the top paper to the background paper, make sure you are very clear on its size and placement.
This is because the duct tape will pick up some color from the background paper, making it impossible to take off without ruining the image.
Tip: You can do this with more than one top layer, but be careful not to use too many or the pattern will look overcrowded.
Step 4) Tape the Paper on the Item:
Stick the sublimation papers together and then put them on the t-shirt. Then, tape the background paper to the shirt so that it covers the top paper.
Step 5) Turn on the Heat Press:
Last, use the heat press usually. When the time is up, take the paper off the t-shirt and the two patterns should be able to be seen together without any problems.
Related Post: Can You Sublimate on Canvas
Challenges of Overlapping Sublimation:
After mastering the fundamentals, it is time to confront the primary obstacle: overlapping sublimation. This method entails the application of various colors and designs, but it is not as straightforward as it may appear. Problems such as:
- Ghosting of images
- Designs that are blurry or faded
- Overlay issues caused by semi-transparent coatings
- Color irregularities may often appear as a result of uneven heat.
The ghosting effect is a prevalent issue that results in color distortion in overlapping prints. This occurs when the transfer moves during the process, resulting in the mixing of the hues of the first and second layers, resulting in a blurry image. Additionally, the overlapping sublimation process can be complicated by the previous color’s interference with the final chroma and contrast.
Additionally, the effectiveness of overlapping sublimation can be influenced by the molecular-level bonding between the ink and the substrate. The color and clarity of the print may be impacted by the close bond between the ink and substrate when additional layers are added. This is especially important when working with garments.
Effective Methods for Multi-Layer Sublimation:
While these problems exist, it is still possible to become proficient in multi-layer sublimation. You can make beautiful prints with depth and perspective if you know how to do it right. There are three main areas that we need to talk about pre-treatment choices, alignment and registration, and managing temperature and time.
Pre-treatment Options:
Pre-treatment is the first thing that needs to be done for a sublimation print to work. Different pre-treatment methods are used for different types of materials. For example, special solutions are needed for materials like t-shirts that are soft and absorbent. Making sure you use the right sublimation settings for the cloth is also very important for getting a good print.
You may ask, “Why pre-treat?” Pre-treatment makes it easier for the sublimation ink to stick to the cloth, so the colors stay bright and don’t fade. A smooth and even transfer surface is another way that high-quality sublimation papers help make the end product better.
Setting up and Aligning:
Now that your materials are ready, it’s time to talk about registration and alignment. It’s important to be precise here. If the design is off-center or not lined up right, it can quickly go from being a beauty to a disaster. It’s important to pay close attention to the little things and make sure each layer lines up properly to avoid this.
When making complicated, three-dimensional drawings, it’s especially important to make sure that everything is lined up perfectly. A very polished end product can be made by using detailed patterns, layering designs, and making sure that all of the designs are perfectly lined up. You can also get better results with sublimation if you know how to fix mistakes.
Temperature and Time Control:
The most important parts of the sublimation process are temperature and time. For multi-layer sublimation, the best temperature range is between 360°F and 425°F, and the process should last for 45 to 75 seconds. This helps keep the colors and clarity of the picture, even if you are working with an already-made sublimation print.
The key to good sublimation is to know how temperature and time affect the process. Molecules have more energy to change from solid to gas when the temperature goes up.
Too short of a sublimation period, on the other hand, can leave prints faded and unfinished, while too long of a period can cause prints to become too cooked. To get the best results, it’s important to stick to the settings that are suggested, such as 50 to 60 seconds at 380 to 400 degrees Fahrenheit with light to medium pressure for polyester fabric or clothing.
Related Post: Can You Sublimate on Stainless Steel
Material Things to Think About When Overlapping Sublimation:
The material you choose can make or break your sublimation project. Material that is high in rayon is best for overlapping sublimation jobs. Fabrics that aren’t made of at least 75% polyester, especially natural ones like cotton, can make colors less bright and more likely to fade.
What kind of material you use for sublimation printing has a big impact on how the finished product looks and feels. If the polyester content of the material is low, the prints might fade, but if the polyester content is high, the patterns will be brighter and more vivid.
It’s very important that the materials used can receive the sublimation ink for overlapping sublimation to work. The substrates that have already been sublimated mustn’t be broken or weakened. To avoid problems when finishing the product, it’s also important to make sure that overlaps don’t print the picture on top of itself.
How to Fix Common Sublimation Mistakes:
When trying out new methods, even the most skilled people can run into problems. When it comes to sublimation, these problems could happen:
- Banding Problems with moisture
- Going ghost and burning out
- Colors not right
- If you shrink the fabric, transfer shifting, too much heat, or dye movement can cause color changes on your clothes.
Sublimation printing often has issues with blotting and spilling, but these can be fixed with a few easy steps. Here are some ways to stop bleeding:
To stick the sublimation transfer paper to the base, and use tape or adhesive spray.
To keep the ink from getting on the heat source, use butcher paper.
Make sure the ink doesn’t go past the edges of the picture.
The following tips will help you keep your sublimation pictures from blotting and bleeding.
Moving the paper around during the sublimation process is another mistake that a lot of people make. To avoid this, you can:
- To keep the paper in place, use glue spray.
- Put tape on it and tear the edges.
- Slowly open the heat press.
- When you open the press, use a Teflon pillow to lower the pressure.
Follow these steps to make sure the paper stays in place and the sublimation process goes well.
Remember that the best way to get good at sublimation printing is to practice and be patient. If you want to get better at printing, you need to learn from your mistakes.
Related Post: Can You Sublimate On Rayon
Bottom Line:
It turns out that sublimation can be done on top of sublimation! This means you don’t have to worry about color mixing issues if you want to replace an old design with a newer one.
Multi-layer sublimation is a creative and flexible tool that we’ve looked at. It lets you make bright, detailed images on a variety of materials. There are a lot of options if you plan, pay attention to details, and know how the process works. Why wait then? Don’t be afraid to dive into the exciting world of multi-layer sublimation.
FAQ
Last Updated on June 5, 2024 by Muhammad Haseeb

